Logto は、モダンなアプリや SaaS 製品向けに設計された Auth0 の代替です。 Cloud と オープンソース の両方のサービスを提供し、アイデンティティと管理 (IAM) システムを迅速に立ち上げるのに役立ちます。認証 (Authentication)、認可 (Authorization)、マルチテナント管理を すべて一つに まとめて楽しんでください。
Logto Cloud で無料の開発テナントから始めることをお勧めします。これにより、すべての機能を簡単に探索できます。
この記事では、Java Spring Boot と Logto を使用して、Mailgun サインイン体験(ユーザー認証 (Authentication))を迅速に構築する手順を説明します。
前提条件
- 稼働中の Logto インスタンス。紹介ページ をチェックして始めてください。
- Java Spring Boot の基本的な知識。
- 使用可能な Mailgun アカウント。
Logto にアプリケーションを作成する
Logto は OpenID Connect (OIDC) 認証 (Authentication) と OAuth 2.0 認可 (Authorization) に基づいています。これは、複数のアプリケーション間でのフェデレーテッドアイデンティティ管理をサポートし、一般的にシングルサインオン (SSO) と呼ばれます。
あなたの 従来型 Web アプリケーションを作成するには、次の手順に従ってください:
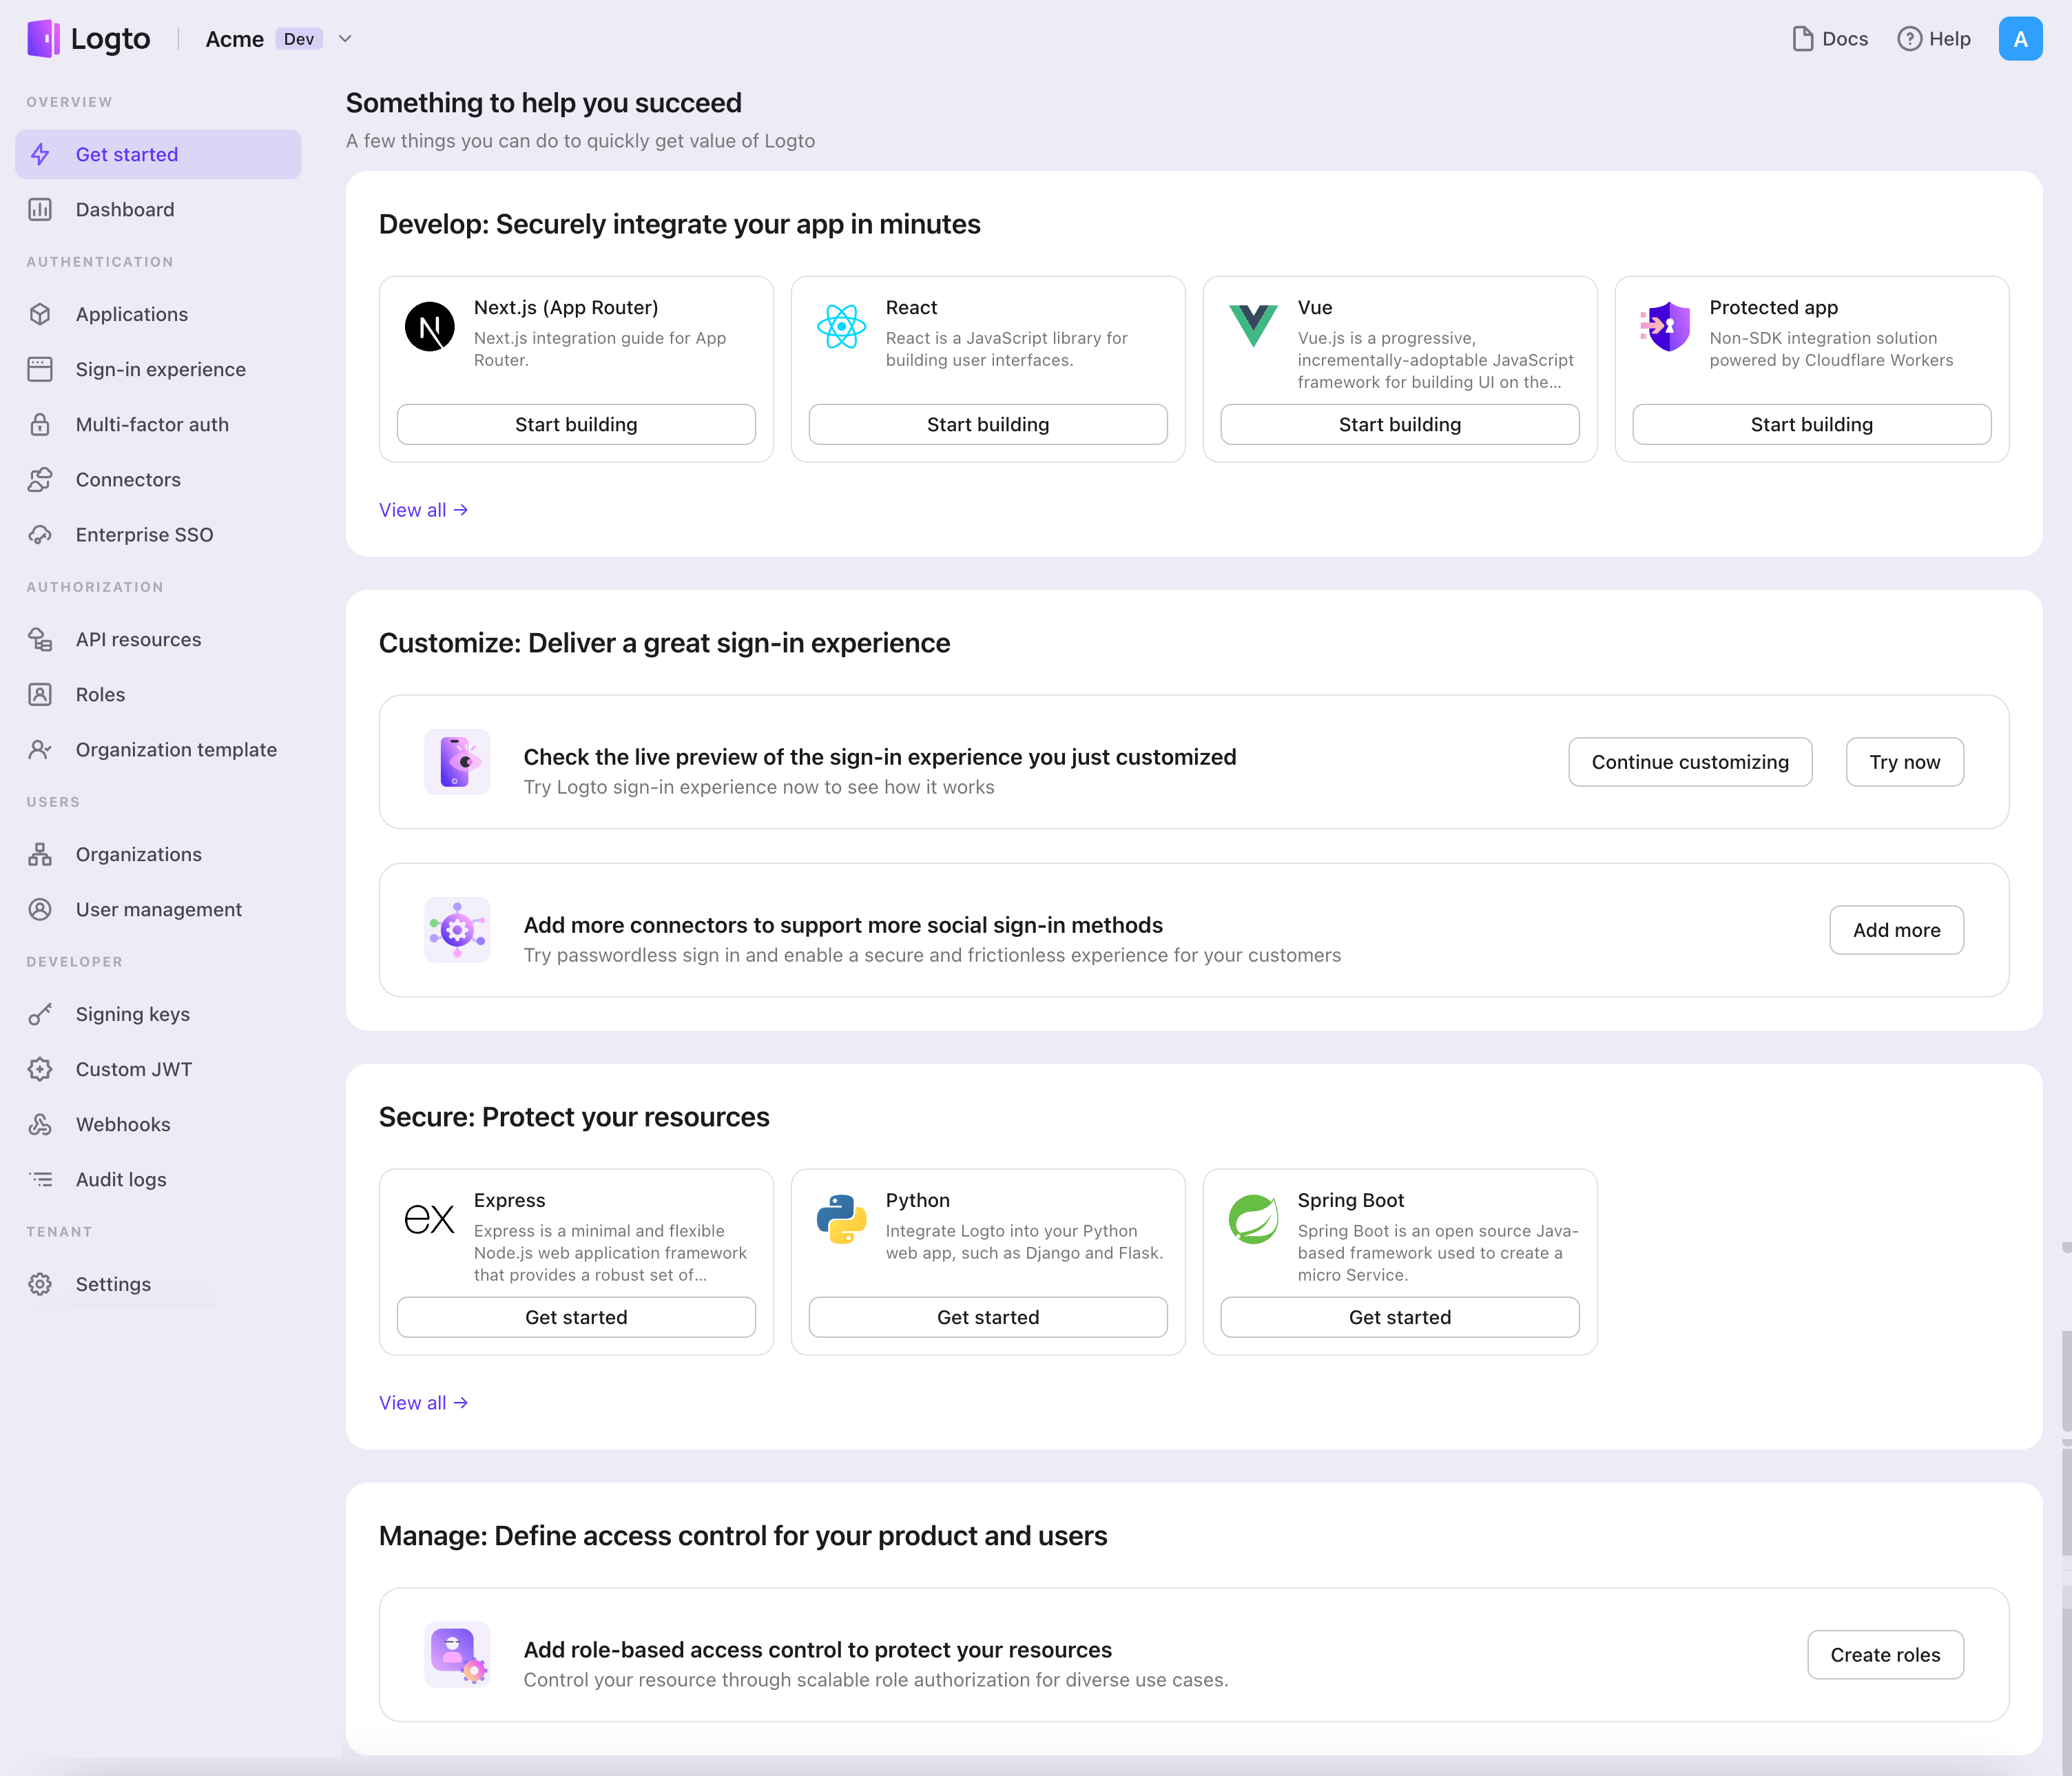
- Logto コンソール を開きます。「Get started」セクションで、「View all」リンクをクリックしてアプリケーションフレームワークのリストを開きます。あるいは、Logto Console > Applications に移動し、「Create application」ボタンをクリックします。
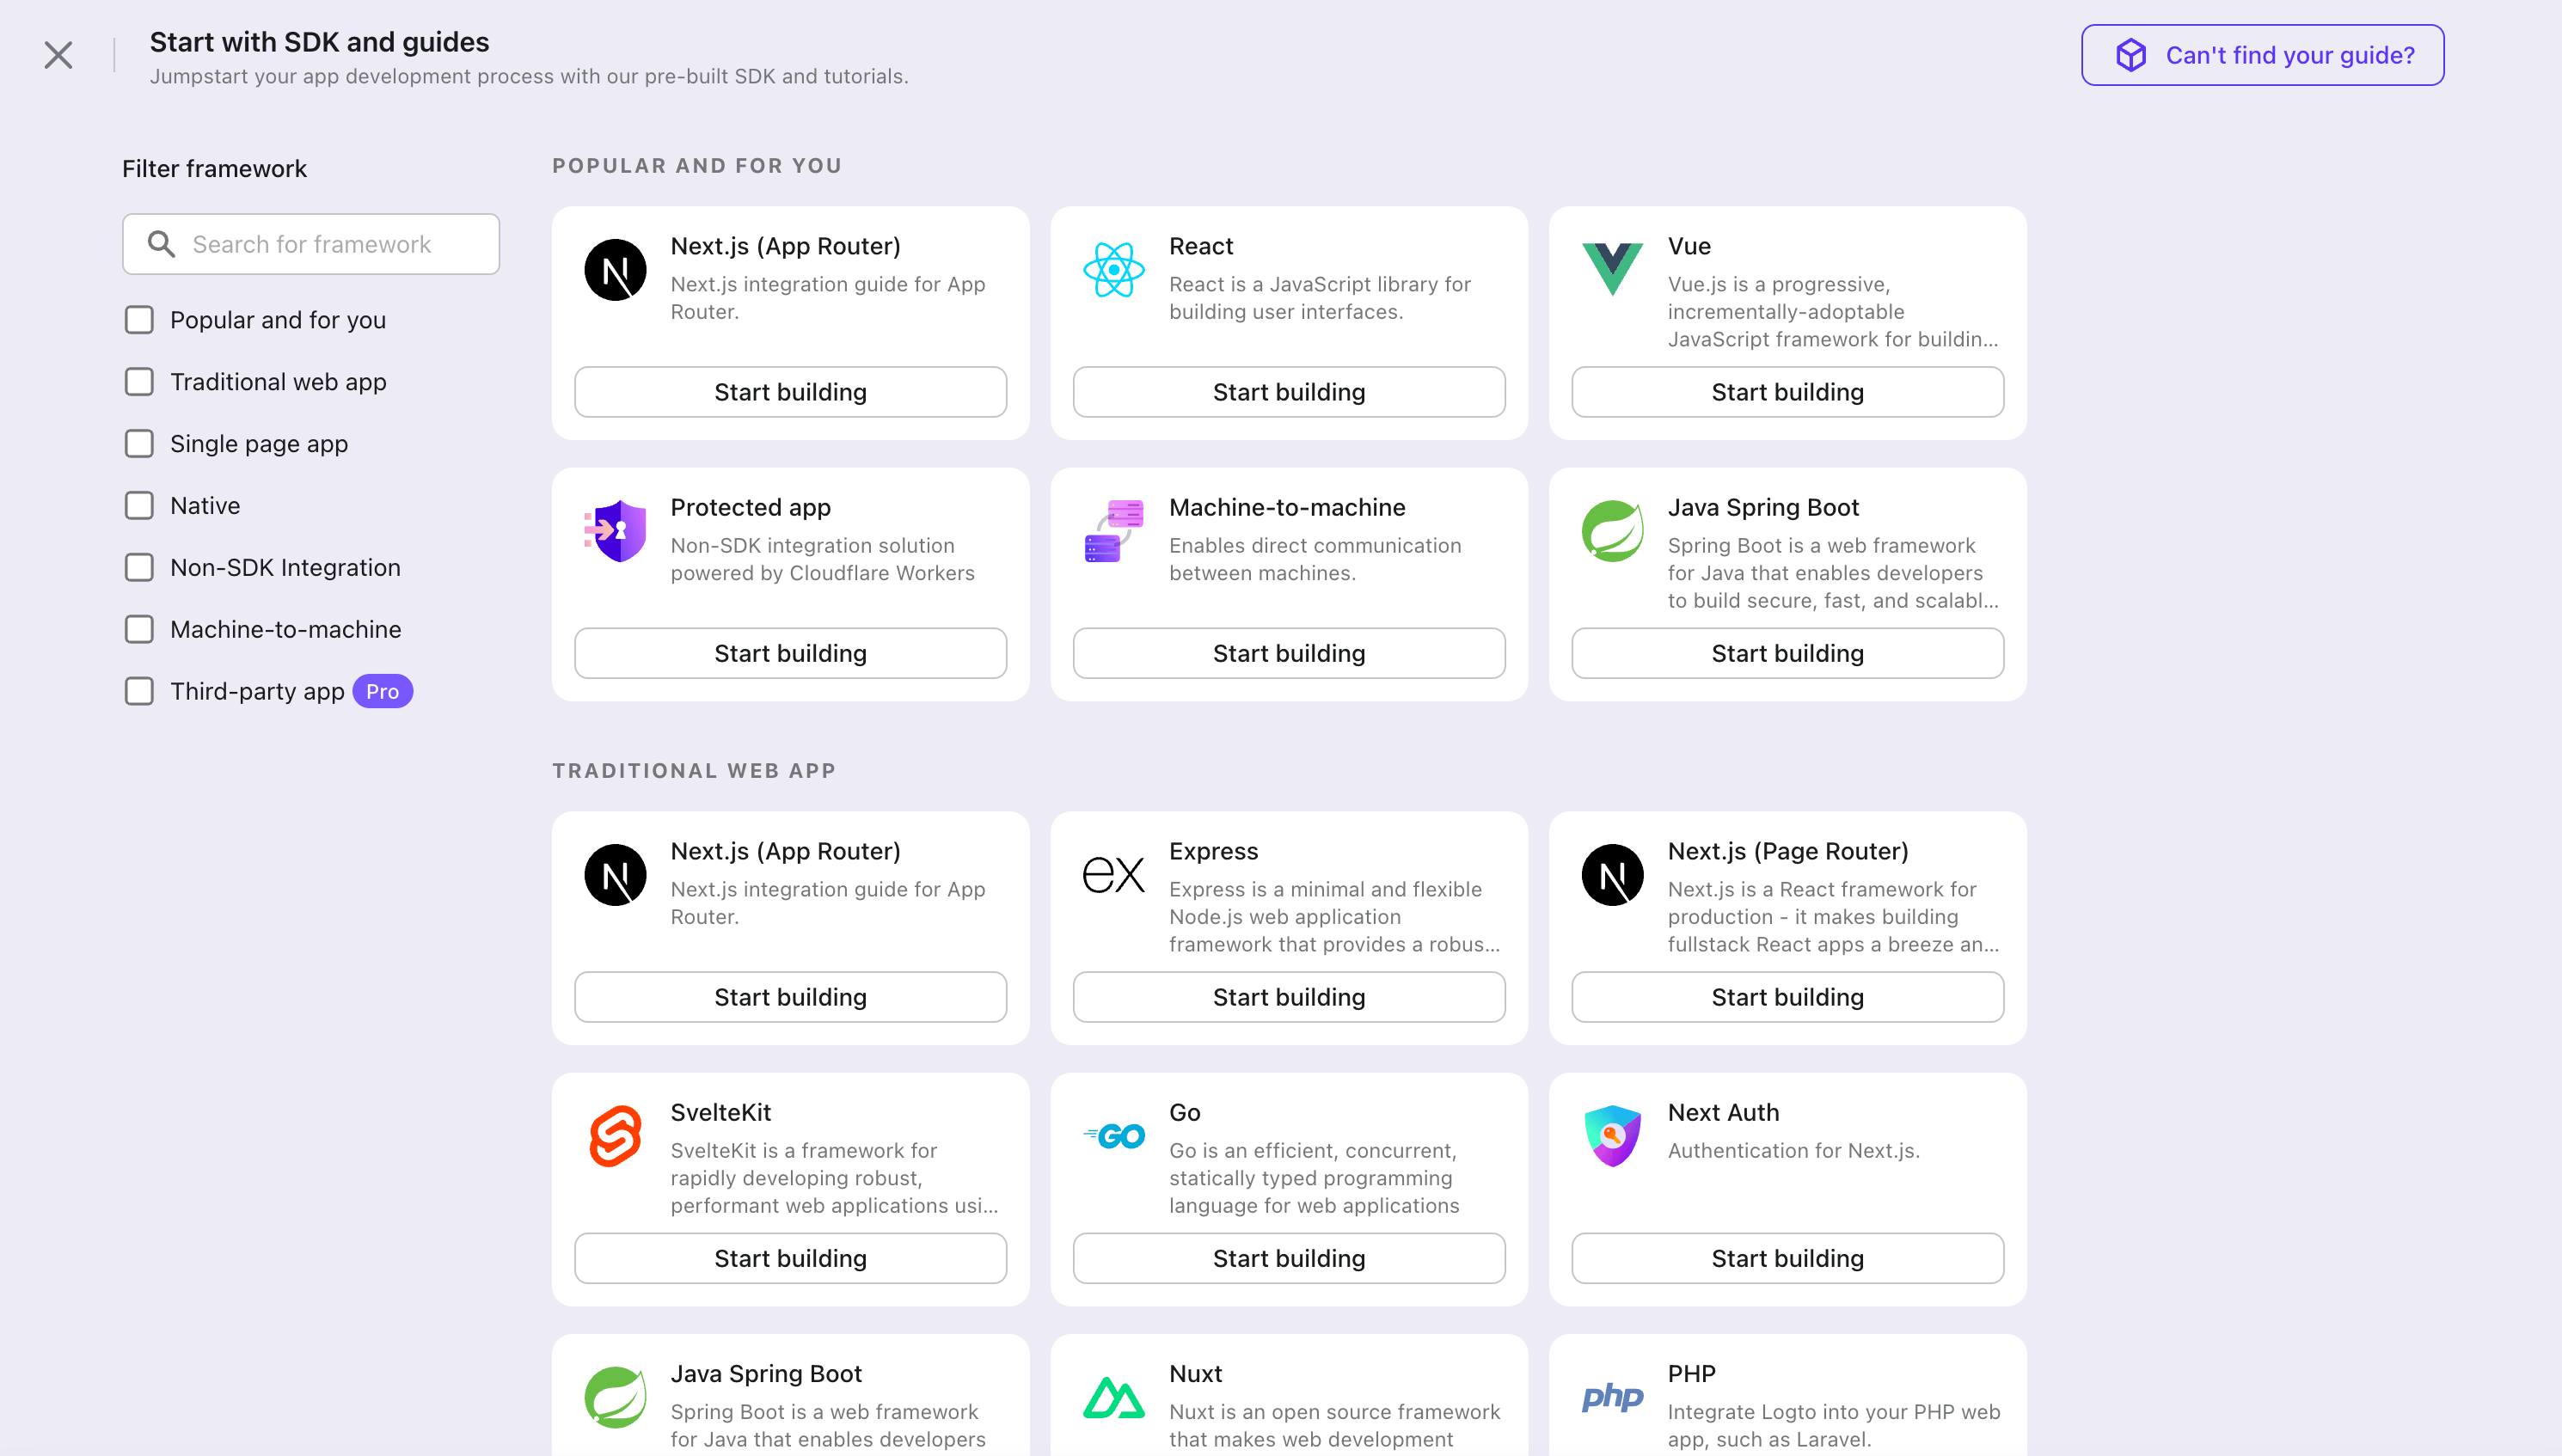
- 開いたモーダルで、左側のクイックフィルターチェックボックスを使用して、利用可能なすべての "従来型 Web" フレームワークをフィルタリングするか、"従来型 Web" セクションをクリックします。"Java Spring Boot" フレームワークカードをクリックして、アプリケーションの作成を開始します。
- アプリケーション名を入力します。例:「Bookstore」と入力し、「Create application」をクリックします。
🎉 タダーン!Logto で最初のアプリケーションを作成しました。詳細な統合ガイドを含むお祝いページが表示されます。ガイドに従って、アプリケーションでの体験を確認してください。
Logto SDK を統合する
- このガイドのサンプルコードは、 spring-boot-sample GitHub リポジトリ で確認できます。
- Logto を Java Spring Boot アプリケーションに統合するために公式 SDK は必要ありません。Logto との OIDC 認証 (Authentication) フローを処理するために、 Spring Security および Spring Security OAuth2 ライブラリ を使用します。
Java Spring Boot アプリケーションの設定
依存関係の追加
gradle ユーザーの場合、次の依存関係を build.gradle ファイルに追加してください:
dependencies {
  implementation 'org.springframework.boot:spring-boot-starter-thymeleaf'
	implementation 'org.springframework.boot:spring-boot-starter-web'
  implementation 'org.springframework.boot:spring-boot-starter-security'
	implementation 'org.springframework.boot:spring-boot-starter-oauth2-client'
}
maven ユーザーの場合、次の依存関係を pom.xml ファイルに追加してください:
<dependency>
  <groupId>org.springframework.boot</groupId>
  <artifactId>spring-boot-starter-thymeleaf</artifactId>
</dependency>
<dependency>
  <groupId>org.springframework.boot</groupId>
  <artifactId>spring-boot-starter-web</artifactId>
</dependency>
<dependency>
  <groupId>org.springframework.boot</groupId>
  <artifactId>spring-boot-starter-security</artifactId>
</dependency>
<dependency>
  <groupId>org.springframework.boot</groupId>
  <artifactId>spring-boot-starter-oauth2-client</artifactId>
</dependency>
OAuth2 クライアント設定
Logto コンソールで新しい Java Spring Boot アプリケーションを登録し、Web アプリケーション用のクライアント認証情報と IdP 設定を取得してください。
次の設定を application.properties ファイルに追加してください:
spring.security.oauth2.client.registration.logto.client-name=logto
spring.security.oauth2.client.registration.logto.client-id={{YOUR_CLIENT_ID}}
spring.security.oauth2.client.registration.logto.client-secret={{YOUR_CLIENT_ID}}
spring.security.oauth2.client.registration.logto.redirect-uri={baseUrl}/login/oauth2/code/{registrationId}
spring.security.oauth2.client.registration.logto.authorization-grant-type=authorization_code
spring.security.oauth2.client.registration.logto.scope=openid,profile,offline_access
spring.security.oauth2.client.registration.logto.provider=logto

spring.security.oauth2.client.provider.logto.issuer-uri={{LOGTO_ENDPOINT}}/oidc
spring.security.oauth2.client.provider.logto.authorization-uri={{LOGTO_ENDPOINT}}/oidc/auth
spring.security.oauth2.client.provider.logto.jwk-set-uri={{LOGTO_ENDPOINT}}/oidc/jwks
実装
詳細に入る前に、エンドユーザーの体験について簡単に説明します。サインインプロセスは次のように簡略化できます:
- あなたのアプリがサインインメソッドを呼び出します。
- ユーザーは Logto のサインインページにリダイレクトされます。ネイティブアプリの場合、システムブラウザが開かれます。
- ユーザーがサインインし、あなたのアプリにリダイレクトされます(リダイレクト URI として設定されています)。
リダイレクトベースのサインインについて
- この認証 (Authentication) プロセスは OpenID Connect (OIDC) プロトコルに従い、Logto はユーザーのサインインを保護するために厳格なセキュリティ対策を講じています。
- 複数のアプリがある場合、同じアイデンティティプロバイダー (Logto) を使用できます。ユーザーがあるアプリにサインインすると、Logto は別のアプリにアクセスした際に自動的にサインインプロセスを完了します。
リダイレクトベースのサインインの理論と利点について詳しく知るには、Logto サインイン体験の説明を参照してください。
サインイン後にユーザーをアプリケーションへリダイレクトするためには、前のステップで client.registration.logto.redirect-uri プロパティを使ってリダイレクト URI を設定する必要があります。
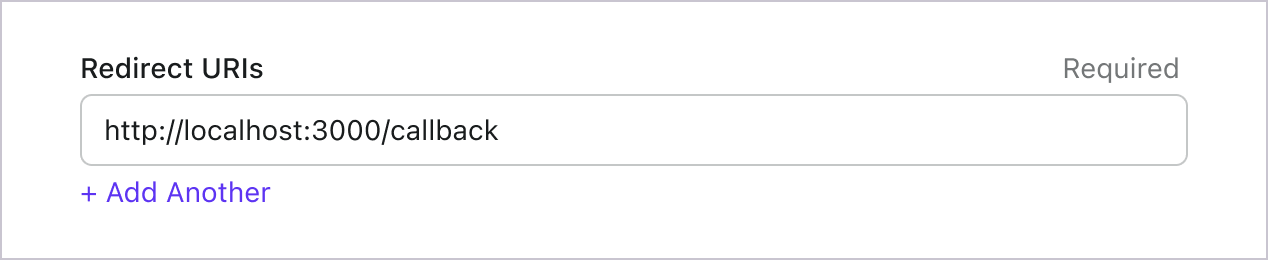
リダイレクト URI を設定する
Logto Console のアプリケーション詳細ページに移動します。リダイレクト URI http://localhost:3000/callback を追加します。
サインインと同様に、ユーザーは共有セッションからサインアウトするために Logto にリダイレクトされるべきです。完了したら、ユーザーをあなたのウェブサイトに戻すと良いでしょう。例えば、http://localhost:3000/ をサインアウト後のリダイレクト URI セクションとして追加します。
その後、「保存」をクリックして変更を保存します。
WebSecurityConfig の実装
プロジェクトに新しいクラス WebSecurityConfig を作成する
WebSecurityConfig クラスは、アプリケーションのセキュリティ設定を構成するために使用します。このクラスは認証 (Authentication) と認可 (Authorization) フローを処理する主要なクラスです。詳細は Spring Security ドキュメント をご確認ください。
package com.example.securingweb;

import org.springframework.context.annotation.Configuration;
import org.springframework.security.config.annotation.web.configuration.EnableWebSecurity;

@Configuration
@EnableWebSecurity

public class WebSecurityConfig {
 // ...
}
idTokenDecoderFactory ビーンを作成する
Logto はデフォルトで ES384 アルゴリズムを使用するため、デフォルトの OidcIdTokenDecoderFactory を上書きして同じアルゴリズムを使う必要があります。
import org.springframework.context.annotation.Bean;
import org.springframework.security.oauth2.client.oidc.authentication.OidcIdTokenDecoderFactory;
import org.springframework.security.oauth2.client.registration.ClientRegistration;
import org.springframework.security.oauth2.jose.jws.SignatureAlgorithm;
import org.springframework.security.oauth2.jwt.JwtDecoderFactory;

public class WebSecurityConfig {
  // ...

  @Bean
  public JwtDecoderFactory<ClientRegistration> idTokenDecoderFactory() {
    OidcIdTokenDecoderFactory idTokenDecoderFactory = new OidcIdTokenDecoderFactory();
    idTokenDecoderFactory.setJwsAlgorithmResolver(clientRegistration -> SignatureAlgorithm.ES384);
    return idTokenDecoderFactory;
  }
}
ログイン成功イベントを処理する LoginSuccessHandler クラスを作成する
ログイン成功後、ユーザーを /user ページへリダイレクトします。
package com.example.securingweb;

import java.io.IOException;

import org.springframework.security.core.Authentication;
import org.springframework.security.web.authentication.AuthenticationSuccessHandler;

import jakarta.servlet.ServletException;
import jakarta.servlet.http.HttpServletRequest;
import jakarta.servlet.http.HttpServletResponse;

public class CustomSuccessHandler implements AuthenticationSuccessHandler {
  @Override
  public void onAuthenticationSuccess(HttpServletRequest request, HttpServletResponse response,
      Authentication authentication) throws IOException, ServletException {
    response.sendRedirect("/user");
  }
}
ログアウト成功イベントを処理する LogoutSuccessHandler クラスを作成する
セッションをクリアし、ユーザーをホームページへリダイレクトします。
package com.example.securingweb;

import java.io.IOException;

import org.springframework.security.core.Authentication;
import org.springframework.security.web.authentication.logout.LogoutSuccessHandler;

import jakarta.servlet.ServletException;
import jakarta.servlet.http.HttpServletRequest;
import jakarta.servlet.http.HttpServletResponse;
import jakarta.servlet.http.HttpSession;

public class CustomLogoutHandler implements LogoutSuccessHandler {
  @Override
  public void onLogoutSuccess(HttpServletRequest request, HttpServletResponse response, Authentication authentication)
      throws IOException, ServletException {
    HttpSession session = request.getSession();

    if (session != null) {
      session.invalidate();
    }

    response.sendRedirect("/home");
  }
}
WebSecurityConfig クラスに securityFilterChain を追加する
securityFilterChain は、リクエストとレスポンスを処理するフィルタのチェーンです。
securityFilterChain を設定し、ホームページへのアクセスを許可し、それ以外のリクエストには認証 (Authentication) を要求します。ログイン・ログアウトイベントの処理には CustomSuccessHandler と CustomLogoutHandler を使用します。
import org.springframework.context.annotation.Bean;
import org.springframework.security.config.annotation.web.builders.HttpSecurity;
import org.springframework.security.web.DefaultSecurityFilterChain;

public class WebSecurityConfig {
  // ...

  @Bean
  public DefaultSecurityFilterChain securityFilterChain(HttpSecurity http) throws Exception {
    http
      .authorizeRequests(authorizeRequests ->
        authorizeRequests
          .antMatchers("/", "/home").permitAll() // ホームページへのアクセスを許可
          .anyRequest().authenticated() // その他のリクエストは認証 (Authentication) が必要
      )
      .oauth2Login(oauth2Login ->
        oauth2Login
          .successHandler(new CustomSuccessHandler())
      )
      .logout(logout ->
        logout
          .logoutSuccessHandler(new CustomLogoutHandler())
      );
    return http.build();
  }
}
ホームページを作成する
(すでにプロジェクトにホームページがある場合はこのステップをスキップできます)
package com.example.securingweb;

import java.security.Principal;

import org.springframework.stereotype.Controller;
import org.springframework.web.bind.annotation.GetMapping;

@Controller
public class HomeController {
  @GetMapping({ "/", "/home" })
  public String home(Principal principal) {
    return principal != null ? "redirect:/user" : "home";
  }
}
このコントローラーは、ユーザーが認証 (Authentication) されていればユーザーページへリダイレクトし、そうでなければホームページを表示します。ホームページにサインインリンクを追加します。
<body>
  <h1>Welcome!</h1>

  <p><a th:href="@{/oauth2/authorization/logto}">Login with Logto</a></p>
</body>
ユーザーページを作成する
ユーザーページを処理する新しいコントローラーを作成します:
package com.example.securingweb;

import java.security.Principal;
import java.util.Map;

import org.springframework.security.oauth2.client.authentication.OAuth2AuthenticationToken;
import org.springframework.security.oauth2.core.user.OAuth2User;
import org.springframework.stereotype.Controller;
import org.springframework.ui.Model;
import org.springframework.web.bind.annotation.GetMapping;
import org.springframework.web.bind.annotation.RequestMapping;

@Controller
@RequestMapping("/user")
public class UserController {

  @GetMapping
  public String user(Model model, Principal principal) {
    if (principal instanceof OAuth2AuthenticationToken) {
      OAuth2AuthenticationToken token = (OAuth2AuthenticationToken) principal;
      OAuth2User oauth2User = token.getPrincipal();
      Map<String, Object> attributes = oauth2User.getAttributes();

      model.addAttribute("username", attributes.get("username"));
      model.addAttribute("email", attributes.get("email"));
      model.addAttribute("sub", attributes.get("sub"));
    }

    return "user";
  }
}
ユーザーが認証 (Authentication) されると、認証済みプリンシパルオブジェクトから OAuth2User データを取得します。詳細は OAuth2AuthenticationToken および OAuth2User をご参照ください。
ユーザーデータを読み取り、user.html テンプレートに渡します。
<body>
  <h1>User Details</h1>
  <div>
    <p>
    <div><strong>name:</strong> <span th:text="${username}"></span></div>
    <div><strong>email:</strong> <span th:text="${email}"></span></div>
    <div><strong>id:</strong> <span th:text="${sub}"></span></div>
    </p>
  </div>

  <form th:action="@{/logout}" method="post">
    <input type="submit" value="Logout" />
  </form>
</body>
追加のクレーム (Claims) をリクエストする
principal (OAuth2AuthenticationToken) から返されるオブジェクトに一部のユーザー情報が欠けていることがあります。これは、OAuth
2.0 と OpenID Connect (OIDC) が最小特権の原則 (PoLP) に従うように設計されており、Logto
はこれらの標準に基づいて構築されているためです。
デフォルトでは、限られたクレーム (Claims) が返されます。より多くの情報が必要な場合は、追加のスコープ (Scopes) をリクエストして、より多くのクレーム (Claims) にアクセスできます。
「クレーム (Claim)」はサブジェクトについての主張であり、「スコープ (Scope)」はクレーム (Claims) のグループです。現在のケースでは、クレーム (Claim) はユーザーに関する情報の一部です。
スコープ (Scope) とクレーム (Claim) の関係の非規範的な例を示します:
「sub」クレーム (Claim) は「サブジェクト (Subject)」を意味し、ユーザーの一意の識別子(つまり、ユーザー ID)です。
Logto SDK は常に 3 つのスコープ (Scopes) をリクエストします:openid、profile、および offline_access。
追加のユーザー情報を取得するには、application.properties ファイルに追加のスコープを設定できます。たとえば、email、phone、urn:logto:scope:organizations スコープをリクエストするには、application.properties ファイルに次の行を追加します:
spring.security.oauth2.client.registration.logto.scope=openid,profile,offline_access,email,phone,urn:logto:scope:organizations
その後、OAuth2User オブジェクトで追加のクレーム (Claims) にアクセスできます。
アプリケーションを実行してテストする
アプリケーションを実行し、 http://localhost:8080 にアクセスします。
- サインインリンク付きのホームページが表示されます。
- リンクをクリックして Logto でサインインします。
- 認証 (Authentication) に成功すると、ユーザーページにリダイレクトされ、ユーザー情報が表示されます。
- ログアウトボタンをクリックするとサインアウトし、ホームページにリダイレクトされます。
Mailgun コネクターを追加する
Email コネクターは、認証 (Authentication) のためにワンタイムパスワード (OTP) を送信するための方法です。これは、Email ベースの登録、サインイン、二要素認証 (2FA)、アカウント回復を含むパスワードレス認証 (Authentication) をサポートするために メールアドレス の確認を可能にします。 Logto の Email コネクターを使用すると、数分でこれを設定できます。
Email コネクターを追加するには、次の手順に従ってください:
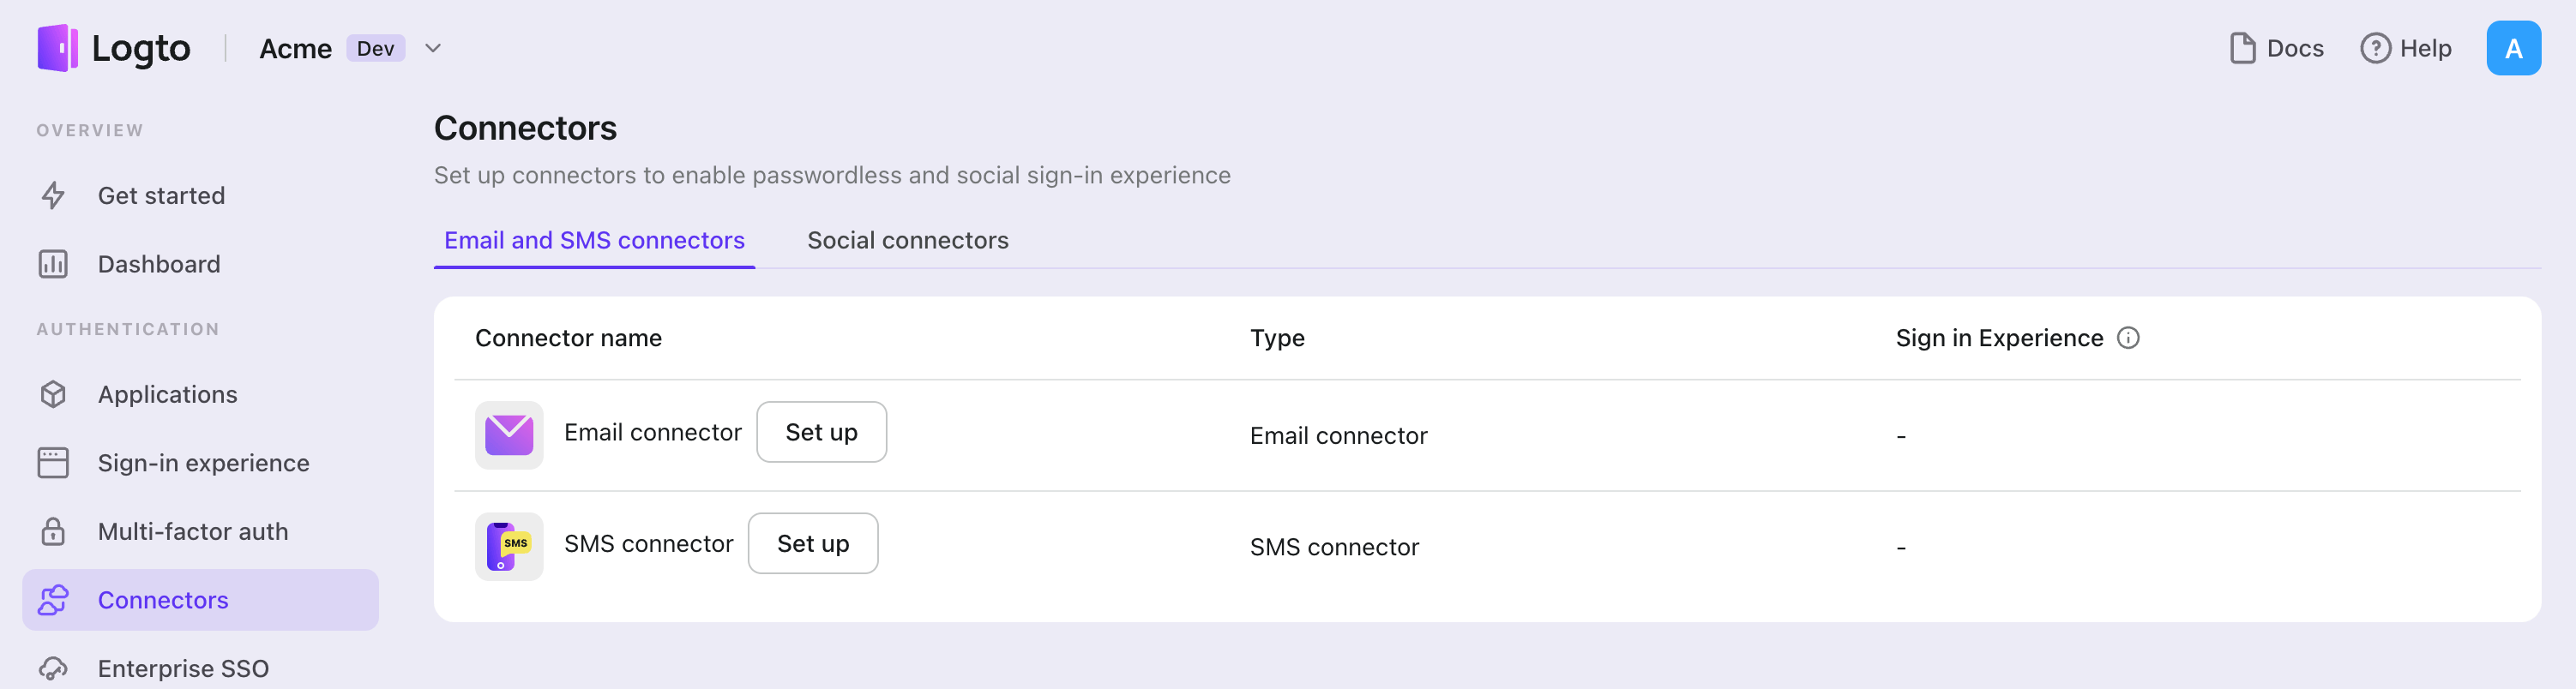
- Console > Connector > Email and SMS connectors に移動します。
- 新しい Email コネクターを追加するには、「Set up」ボタンをクリックし、「Mailgun」を選択します。
- 選択したプロバイダーの README ドキュメントを確認します。
- 「Parameter Configuration」セクションで設定フィールドを完了します。
- JSON エディターを使用して Email テンプレートをカスタマイズします。
- メールアドレス に確認コードを送信して設定をテストします。
インプレースコネクターガイドに従っている場合は、次のセクションをスキップできます。
Mailgun メールコネクター を設定する
前提条件
- Mailgun アカウント
- Mailgun アカウントから取得した API キー(メッセージ(メール)送信の権限が必要です)。詳細は Where Can I Find My API Key and SMTP Credentials? を参照してください。
基本設定
- 異なる Mailgun API エンドポイントを使用する場合は、
endpointフィールドに入力してください。たとえば、EU リージョンの場合はhttps://api.eu.mailgun.netとなります。デフォルト値はhttps://api.mailgun.netです。 domainフィールドには、Mailgun アカウントで登録したドメインを入力してください。この値は Mailgun ダッシュボードの Domains セクションで確認できます。ドメインはexample.comの形式で、https://やhttp://のプレフィックスは不要です。apiKeyフィールドには、Mailgun アカウントで生成した API キーを入力してください。fromフィールドには、メール送信元として使用するメールアドレスを入力してください。このメールアドレスは Mailgun アカウントに登録されている必要があります。メールアドレスはSender Name <[email protected]>の形式で入力してください。
Deliveries
Config オブジェクト
「Deliveries」セクションでは、さまざまなシナリオで送信されるメールの内容を設定できます。これは JSON のキーと値のマップであり、キーは使用タイプ、値は送信するメールの内容設定を含むオブジェクトです。
{
  "<usage-type>": {
    // ...
  }
}
使用タイプ
サポートされている使用タイプは次のとおりです:
Register: ユーザーが登録する際に送信されるメール。SignIn: ユーザーがサインインする際に送信されるメール。ForgotPassword: ユーザーがパスワードをリセットする際に送信されるメール。Generic: ユーザーが汎用的なアクション(例:メールコネクターのテスト)を行う際に送信されるメール。
deliveries 設定で使用タイプが指定されていない場合、汎用メールが送信されます。汎用メールも指定されていない場合、コネクターはエラーを返します。
内容設定
コネクターは、直接 HTML コンテンツまたは Mailgun テンプレートの両方をサポートしています。各使用タイプごとにいずれかを利用できます。
件名や内容には {{code}} プレースホルダーを使用して認証コードを挿入できます。
直接 HTML コンテンツを使用する場合は、次のフィールドを入力してください:
subject: 送信するメールの件名。replyTo: 返信先として使用するメールアドレス。html: (必須)送信するメールの HTML コンテンツ。text: 送信するメールのプレーンテキスト版。
Mailgun テンプレートを使用する場合は、次のフィールドを入力してください:
subject: 送信するメールの件名。replyTo: 返信先として使用するメールアドレス。template: (必須)使用する Mailgun テンプレート名。variables: Mailgun テンプレートに渡す変数。Mailgun へ送信する前に文字列化されるため、JSON のキーと値のマップで指定してください。code変数はコネクターによって自動的に追加されるため、含める必要はありません。
例
以下は deliveries 設定の例です:
{
  "Register": {
    "subject": "{{code}} is your verification code",
    "replyTo": "Foo <[email protected]>",
    "html": "<h1>Welcome to Logto</h1><p>Your verification code is {{code}}.</p>",
    "text": "Welcome to Logto. Your verification code is {{code}}."
  },
  "SignIn": {
    "subject": "Welcome back to Logto",
    "replyTo": "Foo <[email protected]>",
    "template": "logto-sign-in",
    "variables": {
      "bar": "baz"
    }
  }
}
設定を保存する
Logto コネクター設定エリアで必要な値をすべて記入したことを確認してください。「保存して完了」または「変更を保存」をクリックすると、Mailgun コネクターが利用可能になります。
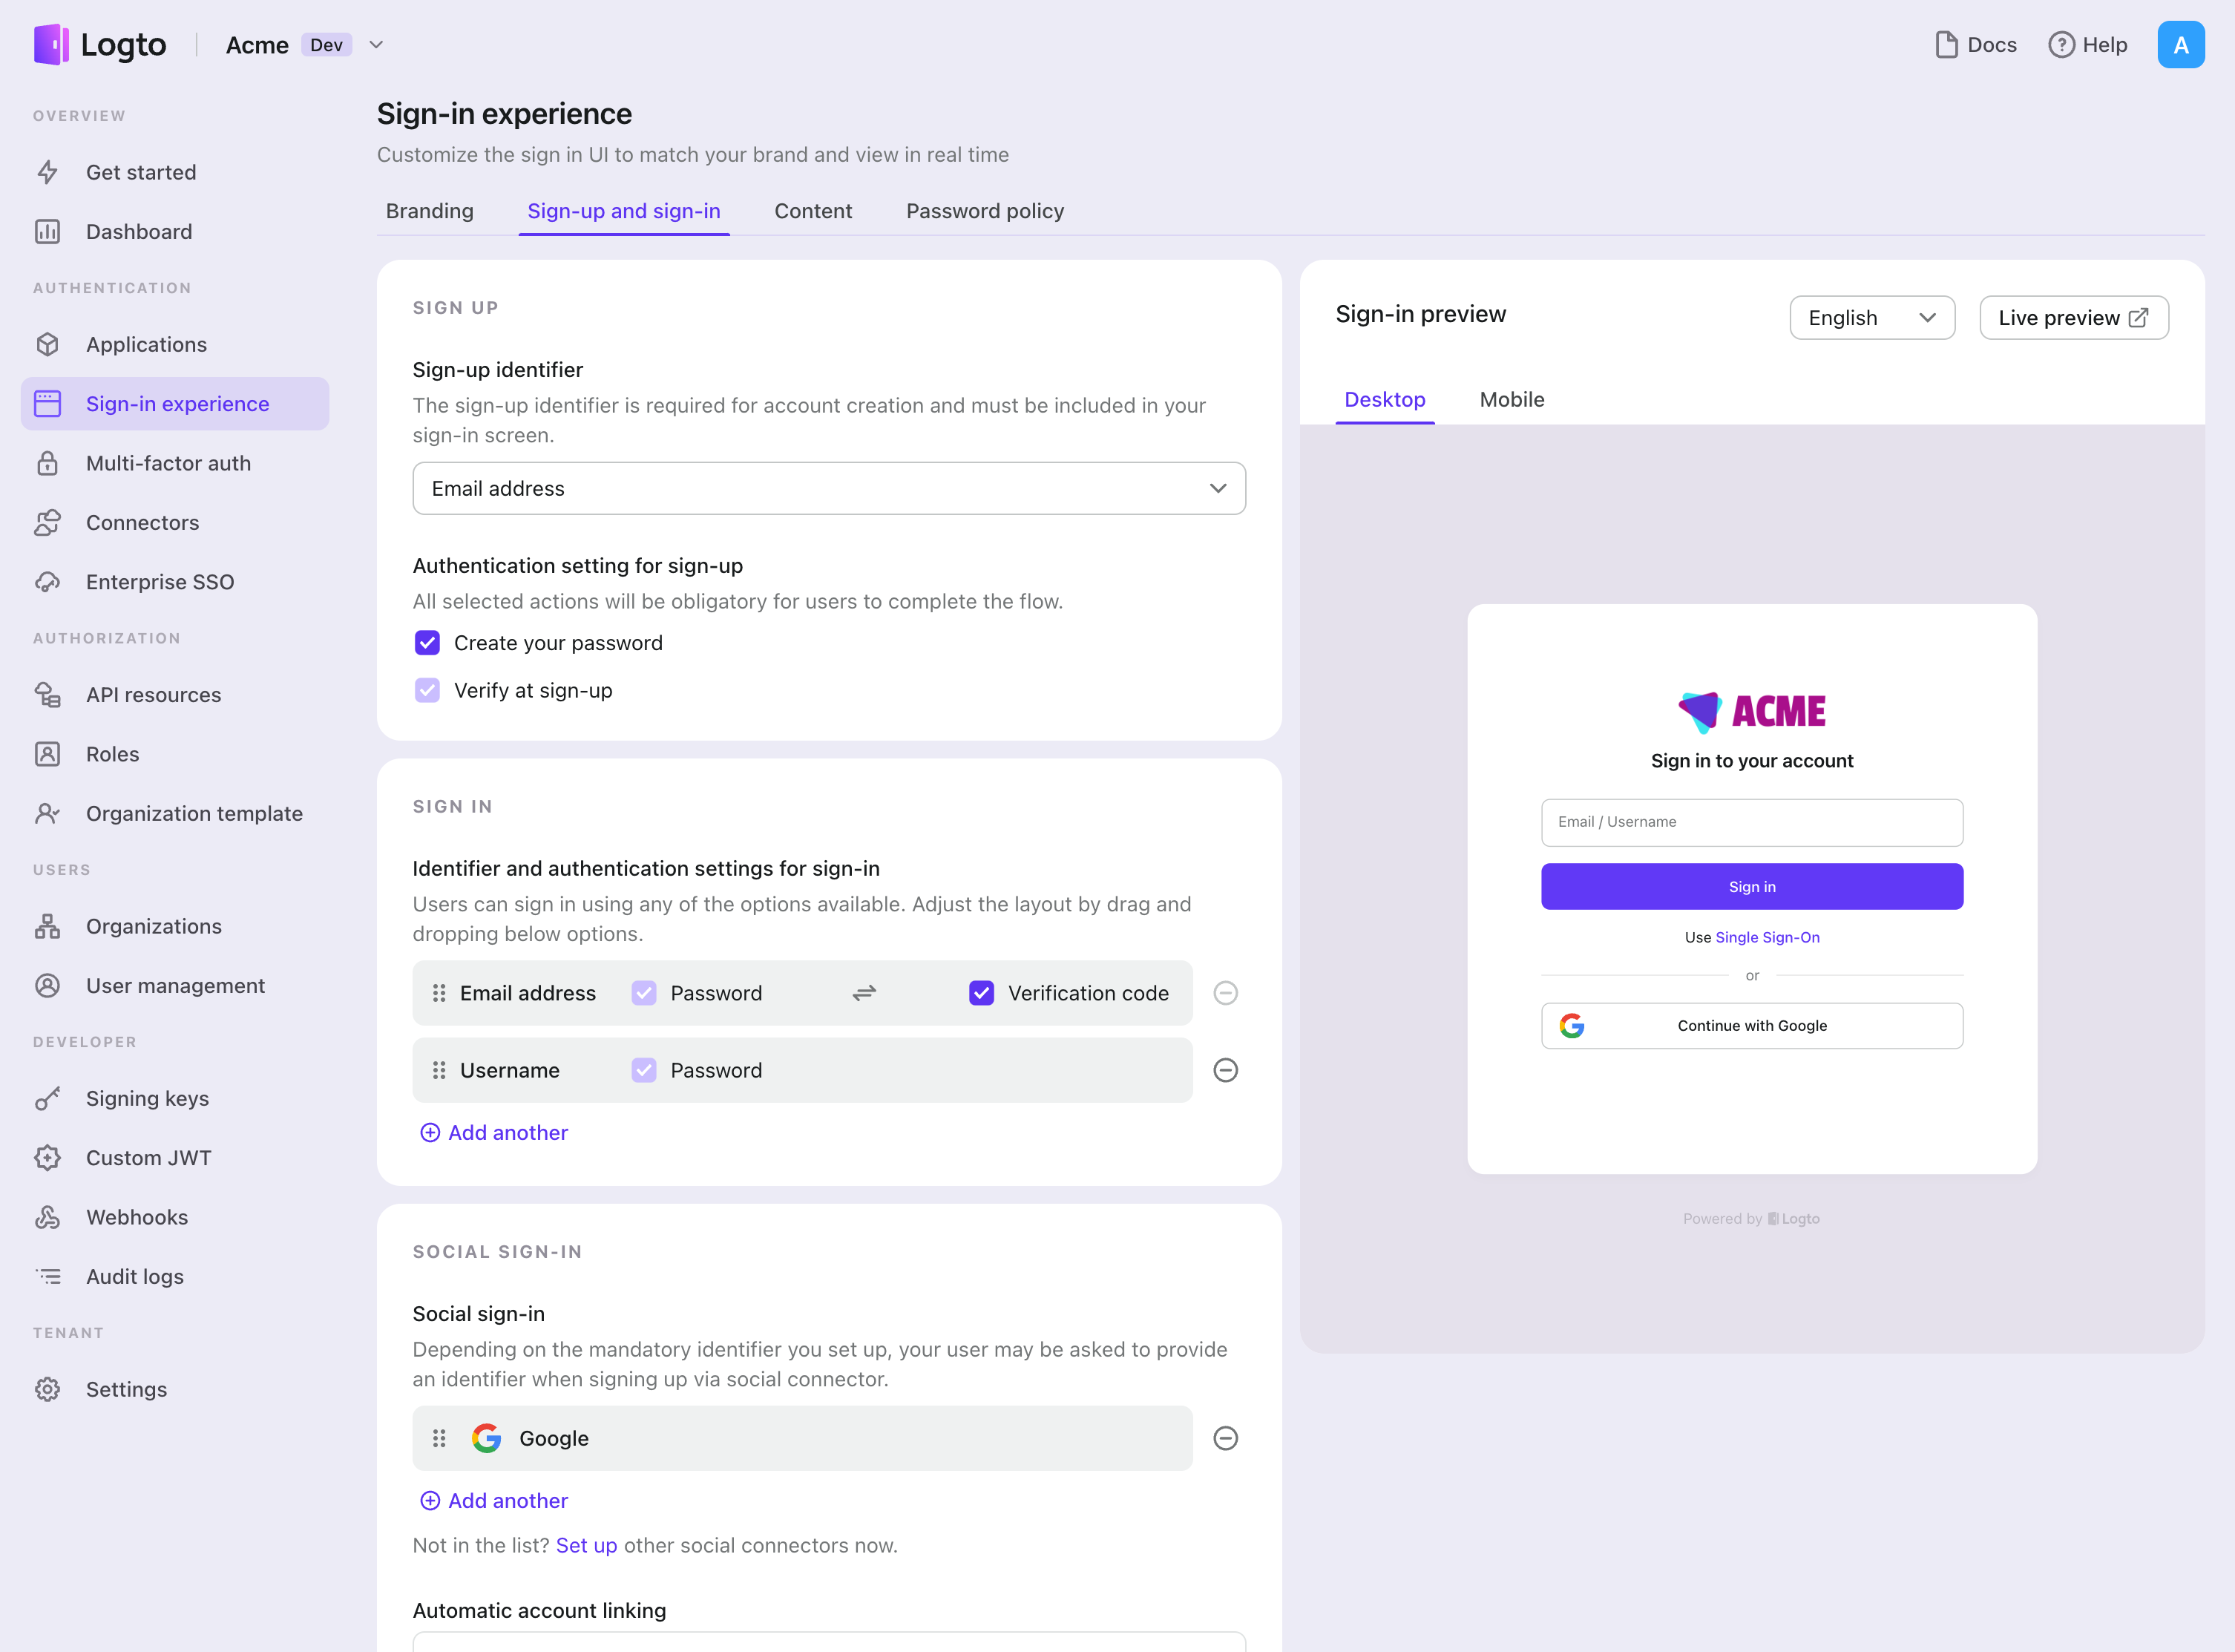
サインイン体験で Mailgun コネクターを有効にする
コネクターを正常に作成したら、電話番号ベースのパスワードレスログインと登録を有効にできます。
- コンソール > サインイン体験 > サインアップとサインイン に移動します。
- サインアップ方法を設定します(オプション):
- サインアップ識別子として "メールアドレス" または "Email or phone number" を選択します。
- "Verify at sign-up" は強制的に有効化されます。登録時に "Create a password" を有効にすることもできます。
- サインイン方法を設定します:
- サインイン識別子の一つとして メールアドレス を選択します。複数の利用可能な識別子(メール、電話番号、ユーザー名)を提供できます。
- 認証 (Authentication) 要素として "Verification code" および / または "Password" を選択します。
- "Save changes" をクリックし、"Live preview" でテストします。
OTP を使用した登録とログインに加えて、パスワードの回復や ベースのセキュリティ検証を有効にし、メールアドレス をプロファイルにリンクすることもできます。詳細については、エンドユーザーフロー を参照してください。
テストと検証
Java Spring Boot アプリに戻ります。これで Mailgun を使用してサインインできるはずです。お楽しみください!
さらなる読み物
エンドユーザーフロー:Logto は、MFA やエンタープライズシングルサインオン (SSO) を含む即時使用可能な認証 (Authentication) フローを提供し、アカウント設定、セキュリティ検証、マルチテナント体験の柔軟な実装のための強力な API を備えています。
認可 (Authorization):認可 (Authorization) は、ユーザーが認証 (Authentication) された後に行えるアクションやアクセスできるリソースを定義します。ネイティブおよびシングルページアプリケーションの API を保護し、ロールベースのアクセス制御 (RBAC) を実装する方法を探ります。
組織 (Organizations):特にマルチテナント SaaS や B2B アプリで効果的な組織機能は、テナントの作成、メンバー管理、組織レベルの RBAC、およびジャストインタイムプロビジョニングを可能にします。
顧客 IAM シリーズ:顧客(または消費者)アイデンティティとアクセス管理に関する連続ブログ投稿で、101 から高度なトピックまでを網羅しています。